2022-09-25 11:22:59 +08:00
+++
author = "FlintyLemming"
2023-03-08 20:41:13 +08:00
title = "自建 Tailscale DERP 服务器"
2022-09-25 11:24:16 +08:00
slug = "c048b27771374b6588b5ff08563e1f3c"
2022-09-25 11:22:59 +08:00
date = "2022-09-17"
description = ""
categories = ["Network", "Linux"]
tags = ["Tailscale"]
2024-07-31 16:52:27 +08:00
image = "https://img.mitsea.com/blog/posts/2022/09/%E8%87%AA%E5%BB%BA%20Tailscale%20DERP/title.avif"
2022-09-25 11:22:59 +08:00
+++
## 配置 Go 环境
1. 在 Go 官网查找并下载最新版
[Downloads - The Go Programming Language ](https://go.dev/dl/ )
2. 解压并放到 `/usr/local` 文件夹中
```bash
sudo tar -C /usr/local -xvf go1.19.1.linux-amd64.tar.gz
```
2023-03-08 20:41:13 +08:00
3. 准备 gopath 文件夹。gopath 文件夹建议放在当前用户自己的文件夹里,否则后面安装会提示没有权限。我习惯在个人文件夹的根目录下创建一个 AppData 文件夹存放数据。
```bash
mkdir -p ~/AppData/gopath
```
4. 配置 shell 环境
2022-09-25 11:22:59 +08:00
编辑 `.profile` 文件
```bash
2023-03-08 20:41:13 +08:00
sudo nano /etc/profile
2022-09-25 11:22:59 +08:00
```
2023-03-08 20:41:13 +08:00
在最后一行加上(注意这里的 GOPATH 一定要换成你自己刚才创建的那个文件夹)
2022-09-25 11:22:59 +08:00
```bash
2023-03-08 20:41:13 +08:00
export GOROOT=/usr/local/go
export GOPATH=/home/username/AppData/gopath
export GOBIN=$GOPATH/bin
export PATH=$PATH:$GOROOT/bin
export PATH=$PATH:$GOPATH/bin
2022-09-25 11:22:59 +08:00
```
刷新设置
```bash
2023-03-08 20:41:13 +08:00
source /etc/profile
2022-09-25 11:22:59 +08:00
```
执行 `go version` 命令,能看到版本就行
## 安装 DERP
执行下面的命令安装
```bash
go install tailscale.com/cmd/derper@main
```
2023-03-08 20:41:13 +08:00
如果安装速度慢,可以配置下国内镜像
```jsx
go env -w GO111MODULE=on
go env -w GOPROXY=https://goproxy.cn,direct
```
## 准备 DERP 所需内容
2022-09-25 11:22:59 +08:00
### 域名
准备一个子域名,解析到当前服务器
### SSL 证书
准备域名对应的 SSL 证书,注意名字必须是 < 域名>.crt 和 < 域名>.key,
## 启动 DERP
2023-03-08 20:41:13 +08:00
### 启动服务
2022-09-25 11:22:59 +08:00
```bash
2023-03-08 20:41:13 +08:00
derper -hostname < 域名> -c < 存放配置文件的路径>/derper.conf -a :< 自定义端口> -http-port -1 -certdir < 存放证书的路径> -certmode manual -verify-clients
2022-09-25 11:22:59 +08:00
```
2023-03-08 20:41:13 +08:00
`-c` 是存放配置文件的地方,默认可以不需要,启动时会自动创建,你选择好位置就行。比如你选在 `/home/username/app` 下,那你就写 `/home/username/app/derper.conf`
`-a` 是自定义端口,如果不设置,默认是 443
`-http-port` 是服务启的一个测试页面,用于测试服务是否已经启动,默认是 80, `-1` ,关闭这个测试页面
2022-09-25 11:22:59 +08:00
保活的话,可以把这个做成服务或者直接丢到一个 screen 里跑
2023-03-08 20:41:13 +08:00
### 设置端口映射
如果服务器在内网中,需要把 3478 和你刚才设置的端口暴露到公网中
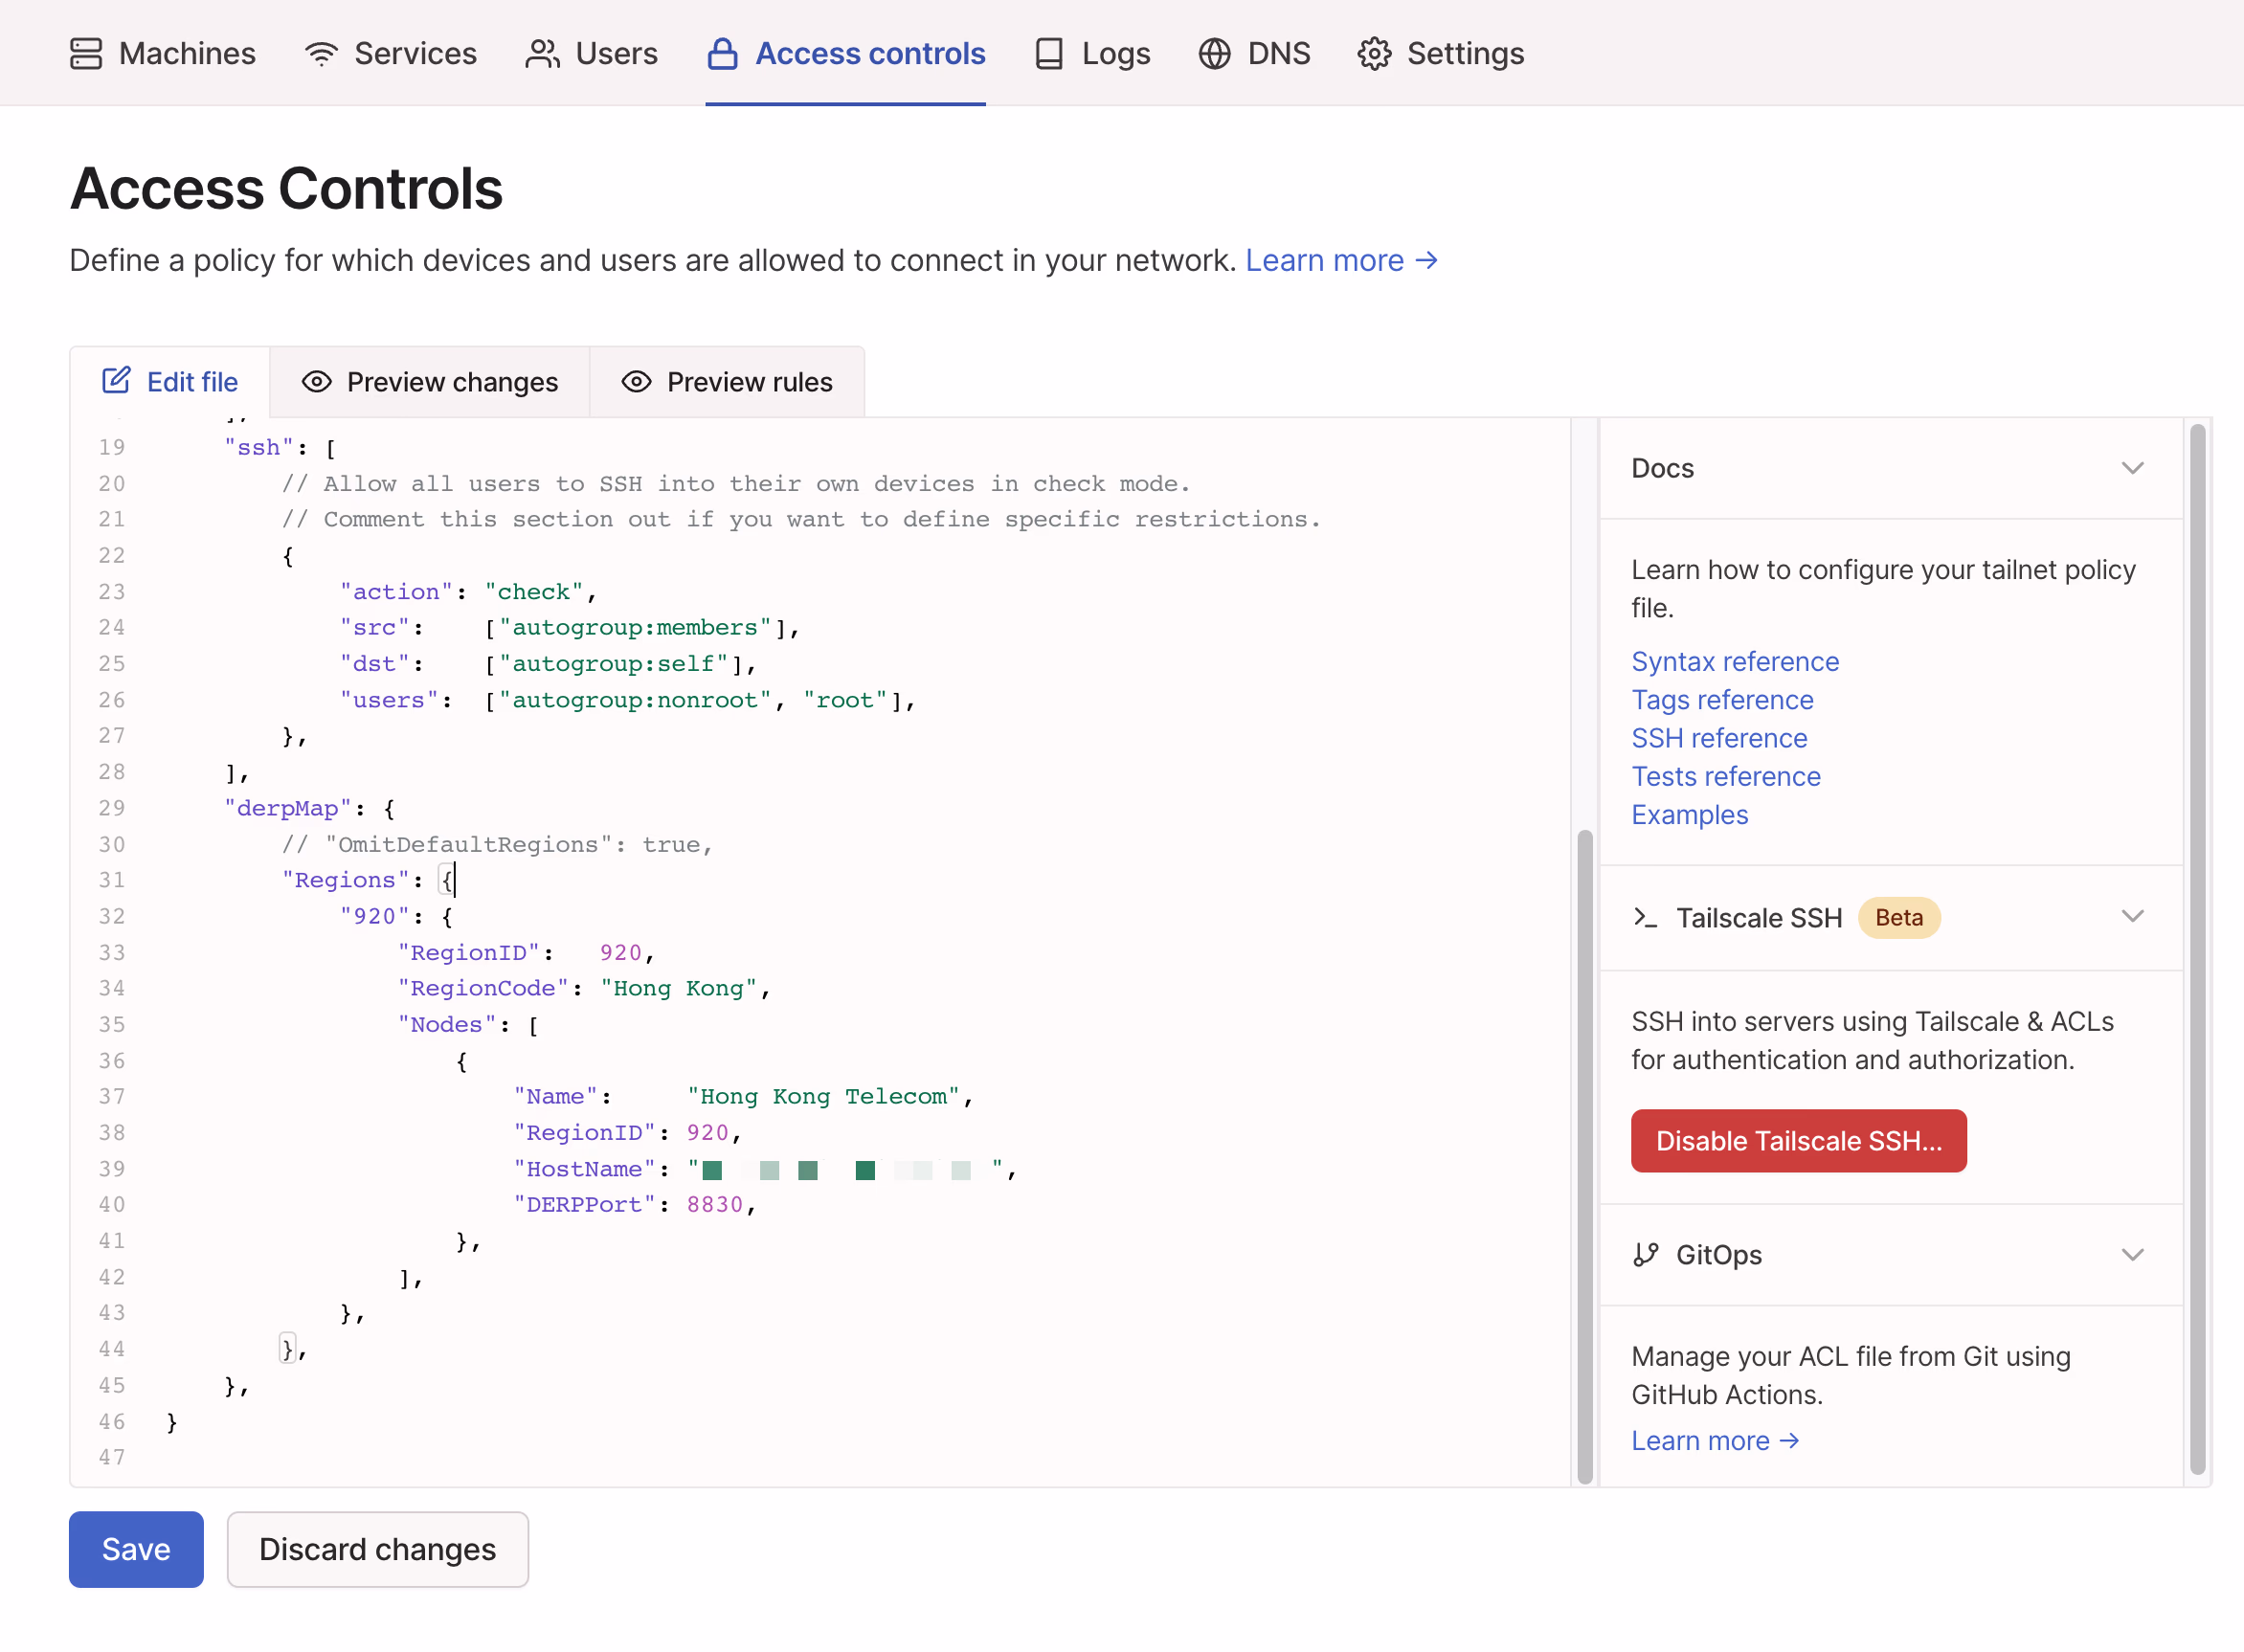
## 配置 ACL
要想自己的 Tailscale 内网设备可以使用自建的 DERP 服务器,需要配置 ACL 文件。在配置文件里添加如下一段,注意把里面的信息替换成自己的。
```yaml
"derpMap": {
// "OmitDefaultRegions": true,
"Regions": {
"xxx": {
"RegionID": xxx,
"RegionCode": "xxx",
"Nodes": [
{
"Name": "xxx",
"RegionID": xxx,
"HostName": "xxx",
"DERPPort": xxx,
},
],
},
},
},
```
2024-07-31 16:52:27 +08:00
2023-03-08 20:41:13 +08:00
2022-09-25 11:22:59 +08:00
## 防止被滥用
默认情况下,只要别人知道你这个域名,就可以使用你的 DERP 服务器。
要想不被滥用也很简单,因为我们之前已经在启动的时候添加了 `-verify-clients` flag,
> Photo by [Martin Sanchez](https://unsplash.com/@martinsanchez?utm_source=unsplash&utm_medium=referral&utm_content=creditCopyText) on [Unsplash](https://unsplash.com/s/photos/global?utm_source=unsplash&utm_medium=referral&utm_content=creditCopyText)